MATERIALS
Lenovo Legion Tower 5i Gaming Desktop - NVIDIA GeForce GTX 1660 Super (4K Video) - Intel Core i7-11700 - 16Gb Memory - 1TB HDD

https://www.amazon.com/gp/product/B09WPTKDQY/ref=ppx_yo_dt_b_search_asin_title?ie=UTF8&th=1
Software = TGC2019 (one-time... NOT annual subscription). I also tried GSPro but refunded it - the 4K graphics were nice, but I preferred TGC2019. Possibly because I was already used to the TGC2019 software and GUI.
The TGC2019 graphics are great also: See my Facebook posts.
https://www.protee-united.com/
SkyTrak Launch Monitor:
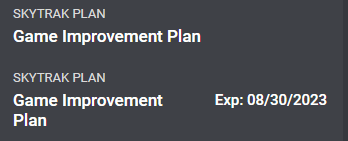
You'll need the SkyTrak Game Improvement plan (annual subscription) to run TGC2019:
You don't need the Game Improvement Plan to start hitting. SkyTrak comes with a driving range, etc. to get started hitting.
Spot Light:
https://www.amazon.com/gp/product/B07DVYXN86/ref=ppx_yo_dt_b_search_asin_title?ie=UTF8&psc=1
Golf Impact/Projector Screen:
https://www.amazon.com/gp/product/B08WWQCMBX/ref=ppx_yo_dt_b_search_asin_title?ie=UTF8&th=1&psc=1
In less than a year (about 10mos.) my launch monitor has logged over 16,000 shots... this screen has taken a beating and held up great! You can get nicer screens for image quality, but I do not have any issues with this cheaper impact screen.
Bungee cords:
https://www.amazon.com/gp/product/B08L3YHQ27/ref=ppx_yo_dt_b_search_asin_title?ie=UTF8&psc=1
https://www.amazon.com/gp/product/B08M89TFY9/ref=ppx_yo_dt_b_search_asin_title?ie=UTF8&psc=1
Sides:
https://www.amazon.com/gp/product/B0748FG2Z6/ref=ppx_yo_dt_b_search_asin_title?ie=UTF8&th=1
These tarps work... but any crazy shanks/toe shots with any clubhead speed will blast right through these tarps... keep that in mind!
Better Bumpers:
https://onestopsimshop.com/collections/custom-better-bumpers
Hitting Mat (DO NOT skimp on this!):
https://www.amazon.com/gp/product/B0048GIWDO/ref=ppx_yo_dt_b_search_asin_title?ie=UTF8&psc=1
The hitting mat is one of the most important components. When you're swinging a club you want realistic results, and realistic impact to your body. If you chunk a shot, you don't want to break your wrists! The hitting mat needs to be high quality and easy on your joints/clubs!
Indoor/Outdoor Golf carpet (or similar). They sell an actual "golf" carpet if you can find it at your store... :
https://www.lowes.com/pd/ProGrass/5014064149
SETUP
First thing I did was set the frame:


The top rail is mounted to rafters in the ceiling - it needs to be anchored well. The sides are bolted to the top with angle iron and bolts, leveled, and then anchored to concrete floor anchors with angle iron.
I'm often asked about headroom... my garage has a 9 foot ceiling. I am 6'4" tall and I have never hit the ceiling with my driver length. If it were an 8 foot ceiling, I wouldn't be able to use my driver. Keep that in mind as you're planning... you also want room to the sides of your swing - plan on using your driver length as a guide. You need room for backswing and follow-through!
One last thing to consider is: do you have friends that are left-handed golfers? You can move the launch monitor, but plan on surrounding space for a left-handed golfer.
If you zoom in on the pics, you can see the frame material I purchased at Lowes... it's in the plumbing section and I forget what it's called. I thought it was "plumber's frame" but I forget.
I actually would not suggest that for framing now... the bungee cords had to be pulled through the holes of the frame on the top rail. Those holes have sharp edges and they will eventually cut through the bungee cords and then you've got to replace them.
You'll also need a way to hang the baffle (I used an old wool rug):


You'll need something similar... the heavy rug acts as a baffle and it is mounted directly behind the screen (actually touching the back of my screen). You can use an old comforter or similar. You want something heavy though... this acts as a baffle to keep the balls from bouncing back at you. The canvas screen absorbs impact pretty good (and the give in the bungee cords help), but with the wool rug... balls just drop to the floor with zero bounce back. You definitely do not want balls bouncing back at you. My driver clubhead speed is 110mph+ and a real golf ball is zinging at such a short distance... you DO NOT want bounce back!
I got a grommet kit from Lowe's. The budget hitting screen I purchased (link above) needs more grommets... it doesn't come with enough grommets. You can see in the pic below how far I spaced the grommets on the three sides. the bottom of my screen just lays there. Having the bottom free-floating actually helps absorb impact.
You'll also need to steam-iron the creases out of that screen after unpacking. Be careful to not get it dirty and iron it well... the smallest crease/dirt will show up when you project and you don't want that in your image.
One additional note on this topic... DO NOT use dirty golf balls! Any dirt on the ball will transfer to your screen and you won't like that dirt spot in your image!
I used the smaller bungee cords to mount the screen and larger ones to support the sides/corners:

Don't make the bungees too tight - they will break, and you only need the screen tight enough to take the projected image well. The bungees assist in screen bounce back.
Above, and below, you can see my sub-floor. This needs to be the same height as your hitting mat for putting. (I'm upgrading my sub-floor soon.)

Try to get the sub-floor as level as possible. Mine is 10 feet long... this will help your putting tremendously. You'll be able to judge your putting lengths on a real golf course after putting with the simulator.
Below, you can see the carpet glued to the sub-floor. I just used 3M spray adhesive:


Your wedge ball strikes will hit the ceiling - believe me!
You'll need to mount the short-throw projector from the ceiling:
https://www.amazon.com/gp/product/B07H3TJKYD/ref=ppx_yo_dt_b_search_asin_title?ie=UTF8&th=1
You can use the link below to get an idea of how far back from the screen to mount it:
https://www.projectorscreen.com/projector-screen-calculators
It will basically be over your head, or slightly behind you when hitting. You don't want to cast a shadow of the hitter onto the screen. That's why the short-throw projector is awesome!
The Optoma EH200ST was about 12-14 feet from the screen for me.
https://www.amazon.com/gp/product/B00MPWNHI8/ref=ppx_yo_dt_b_search_asin_title?ie=UTF8&psc=1
I used the link above (projectorscreen.com) to get a ballpark distance. I then fine-tuned the image (focus, image size (ratio), etc.) to get my exact distance to screen. You can just set the projector on top of a ladder or something to tune location.
You can see projector and spot light location in pic below:

I mounted the sides to the screen frame, ceiling, and then tucked the bottoms under the subfloor. You'll want some give in the sides. Stray balls will punch through that tarp when you smack one with some good clubhead speed... I'm gonna figure out something else for my sides soon.
Additional Pics:


Upgrades:
The pics above don't show latest setup.
I've since rotated the whole setup 90 degrees to get away from garage door rails.
I've also upgraded to the "better bumpers" (link at top of page) and upgraded to:
SkyTrak+
And...
https://www.projectorscreen.com/benq-lk936st-4k-short-throw-laser-projector-5100-lumens
Sides will be updated next, and I may go to a bigger screen soon... thinking on that. I'm thinking about closing off the third bay in my garage with connection to our propane tank for winter heat. The torpedo heater is more than hot enough for our three car garage, but the kerosene is hard on the eyes.
I think I'm going to replace the putting sub-floor eventually also - with a more realistic mat.